# Getting Started
This guide walks you through creating your first guide in Folge — from installation to a finished PDF export.
# Download and Install
Folge is available for Windows and Mac. Download the latest version from https://folge.me/download.
Windows — Run the installer and follow the prompts.
Mac — Open the .dmg and drag Folge to your Applications folder.
# Create a guide
Launch Folge and click My Guides to open the guides list. Click Create Guide to start a new one.
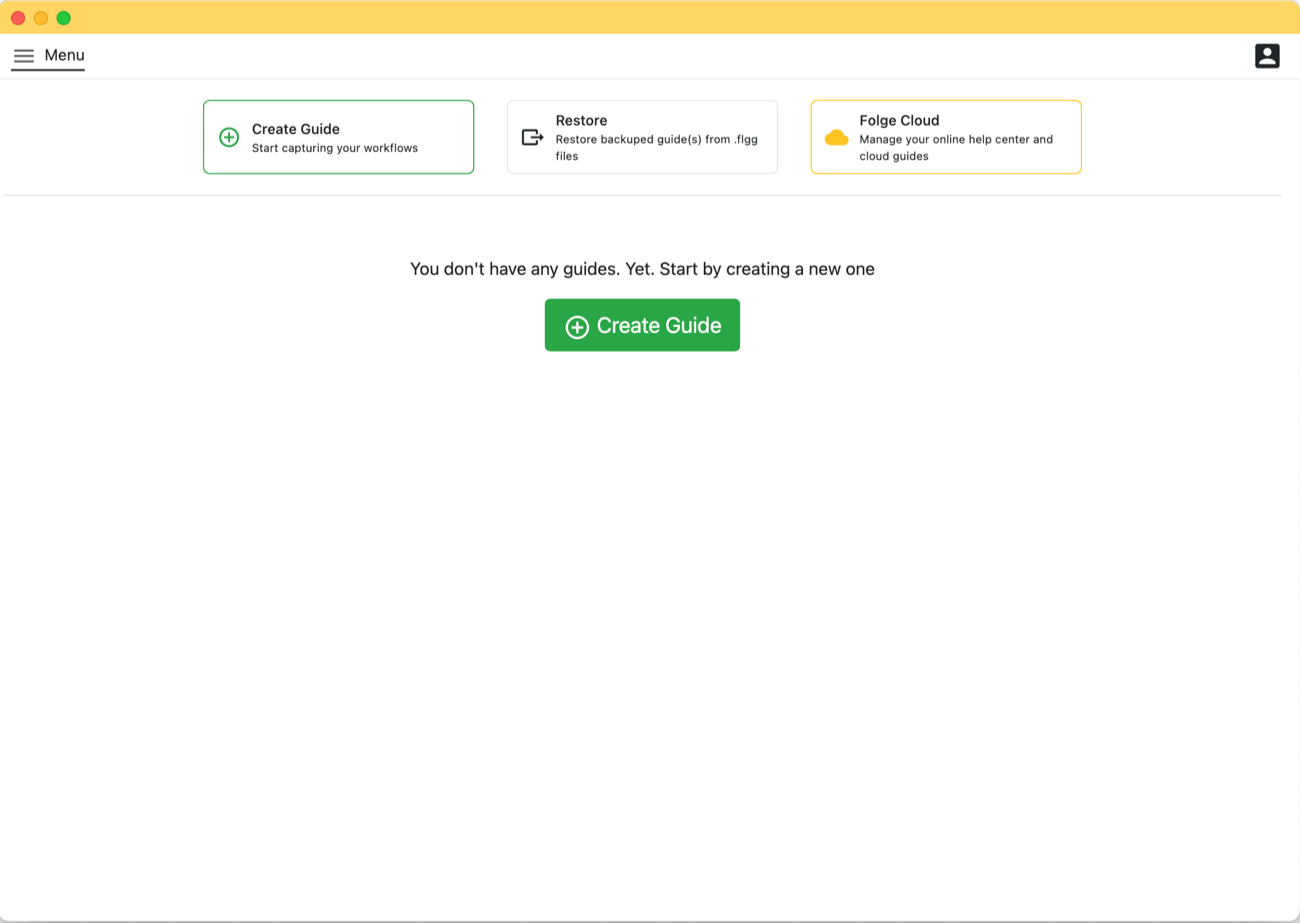
You'll land in an empty guide editor, ready to add steps.
# Capture steps
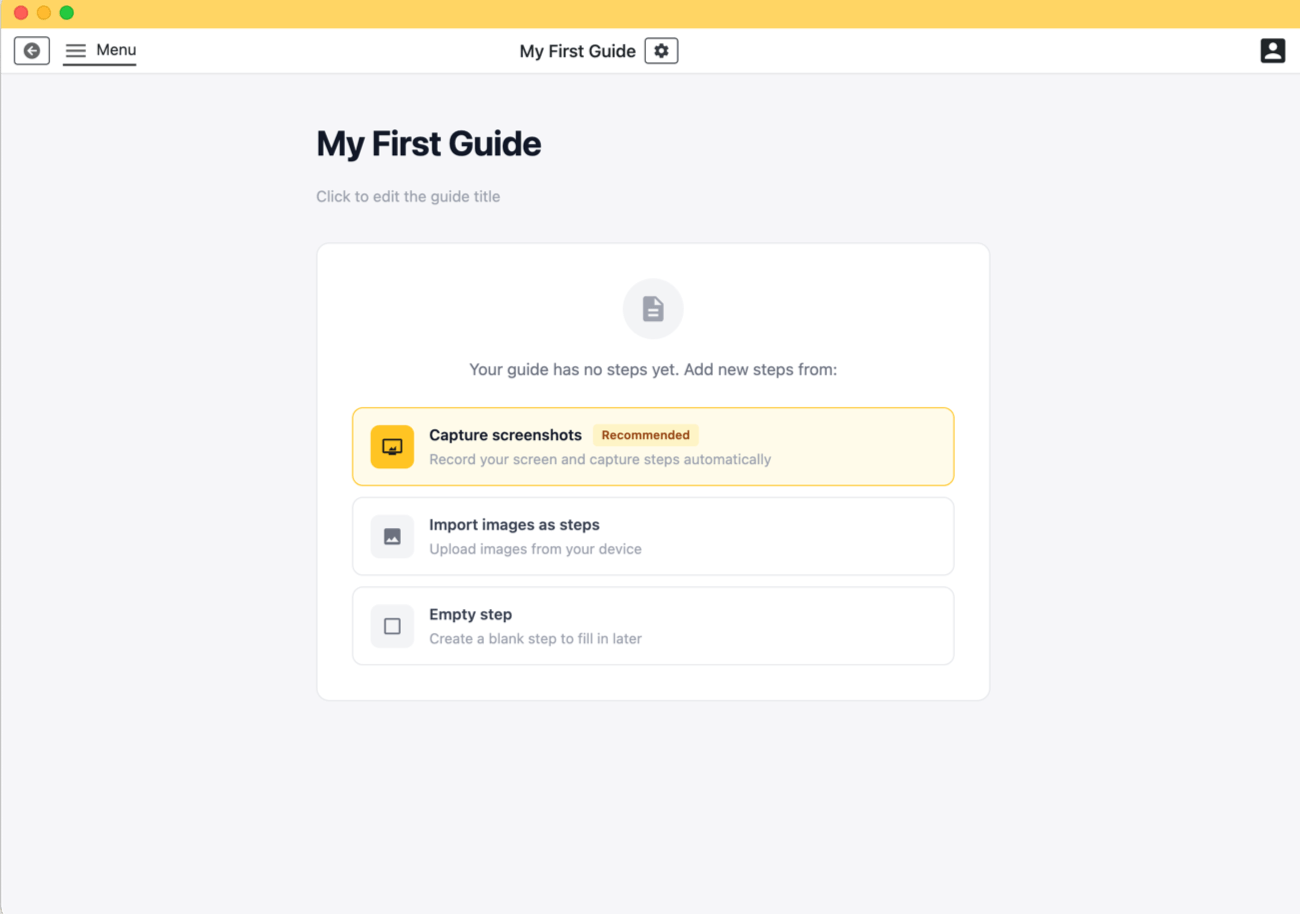
Each guide is made up of steps. You can create steps in several ways:
- Automated capture — Folge captures a screenshot on each mouse click as you work through your app or workflow in multiple apps
- Simple screenshot — Take a one-time screenshot of your screen
- Import images — Add existing images from your computer
- Empty step — Add a step without an image for text-only content
To start capturing, click the first button "Capture screenshots". Folge will minimize and show a capture overlay where you can select the area to record.
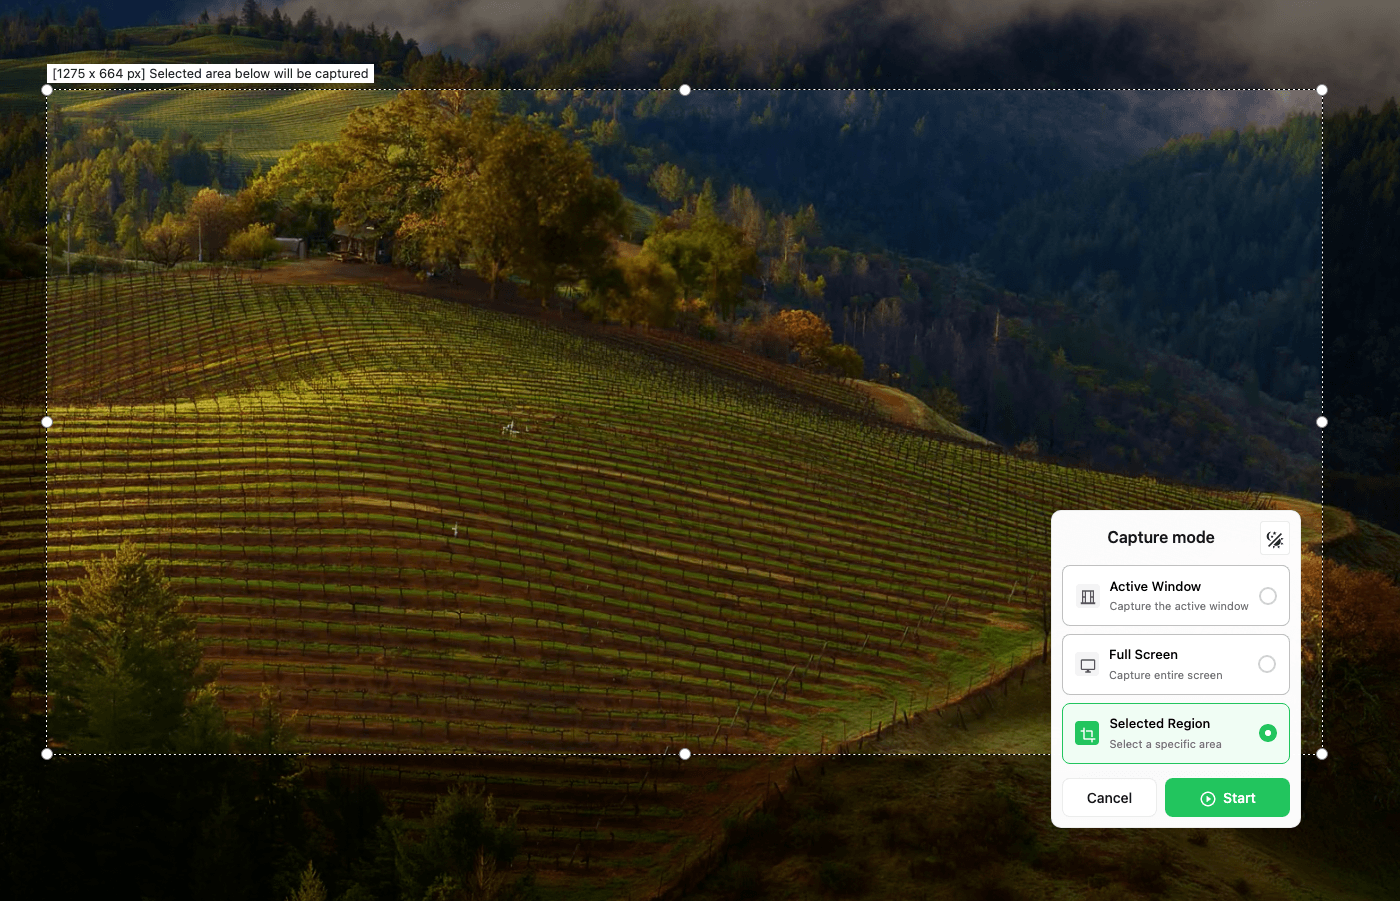
Folge offers 3 modes of capturing your apps or workflows:
- Active Window - Folge will capture window of the app you are working with. You can switch to any app if you want, and between your monitors. Folge will continue capturing only the active window
- Full Screen - Folge will capture the whole screen, not just the active window. This mode is useful when you want to show multiple windows in one screenshot. This mode also works across multiple monitors if you have more than one plugged in.
- Region Capture - Folge will only capture the area you have specified with a draggable region. This mode only works on the monitor where you initiated the capture.
You may pause capturing and switch between modes at any point.
Select the Active Window mode and click Start, then use your app as usual — Folge captures a screenshot on each click. You can see the preview in the floating window. When you're done, click Finish to return to the editor.
TIP
Don't worry about missing a step. You can always add more steps later by capturing again or importing images.
# Edit your steps
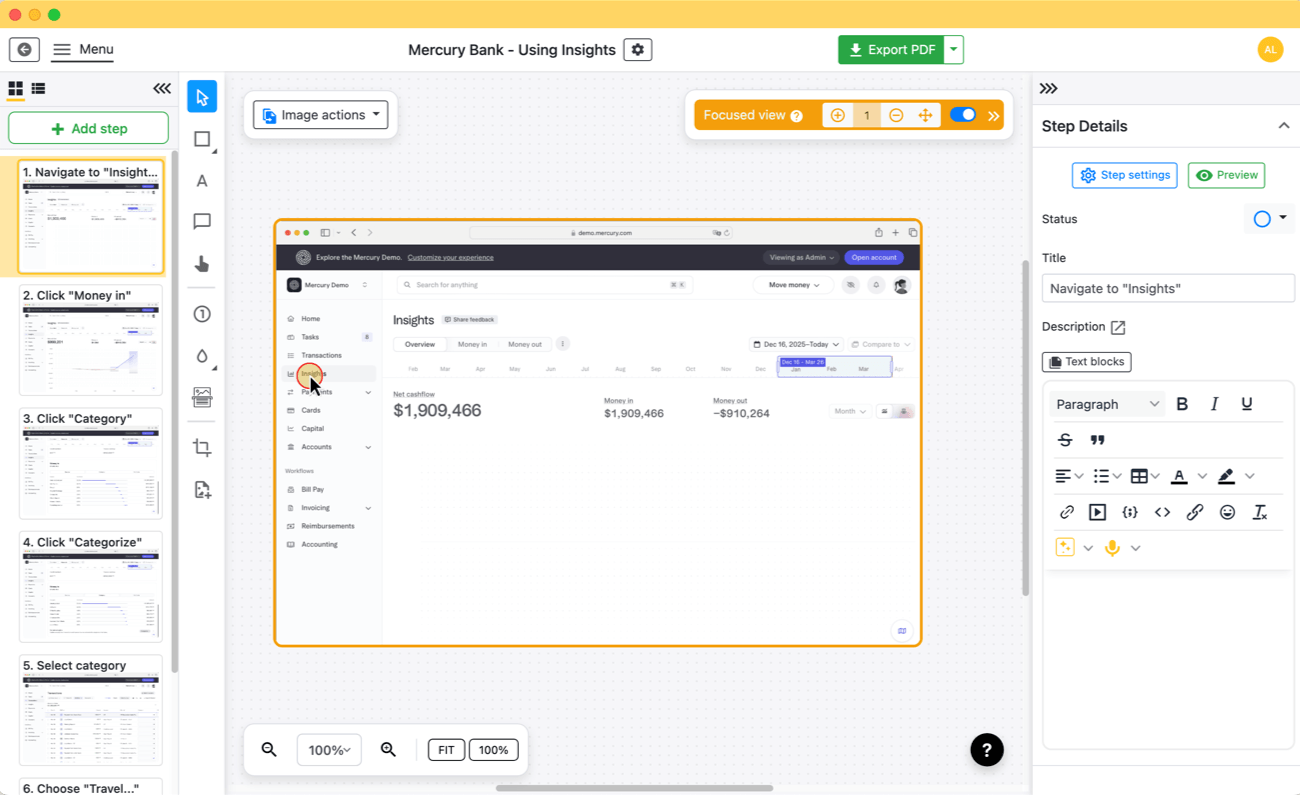
The editor has three main areas:
- Steps list (left) — navigate between steps, reorder by dragging, right-click for management actions
- Canvas (center) — view and annotate your step image
- Properties panel (right) — edit step title, description, and object properties
# Add context to each step
Click a step in the list, then fill in the Title and Description in the properties panel. These will appear in your exported guide.
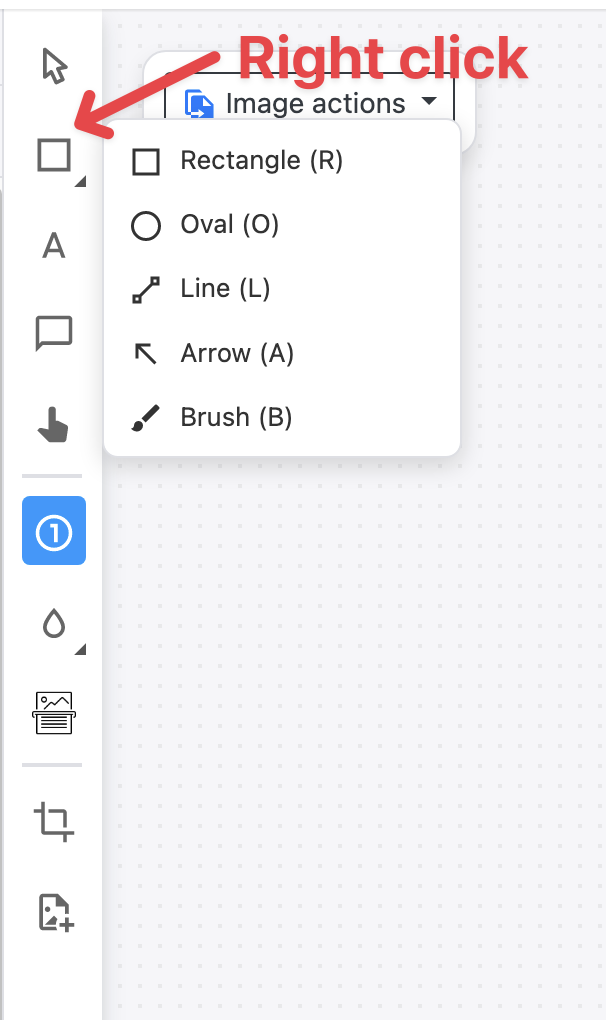
# Annotate your screenshots
Use the annotation toolbar to add tooltips, arrows, shapes, blur areas, and more to highlight important parts of your screenshots. You can right-click icons that have a small triangle to access even more tools and options. Clicking the triangle itself also works.
Folge can also automatically mark your click locations during capture — you can toggle this in Settings.
# Export your guide
When your guide is ready, click the Export button in the header. Choose from the available formats:
- PDF, Word, PowerPoint
- Simple HTML, Rich HTML
- Markdown, JSON
- Image export, animated GIF
- WordPress, Notion, Confluence (and even more in the future)
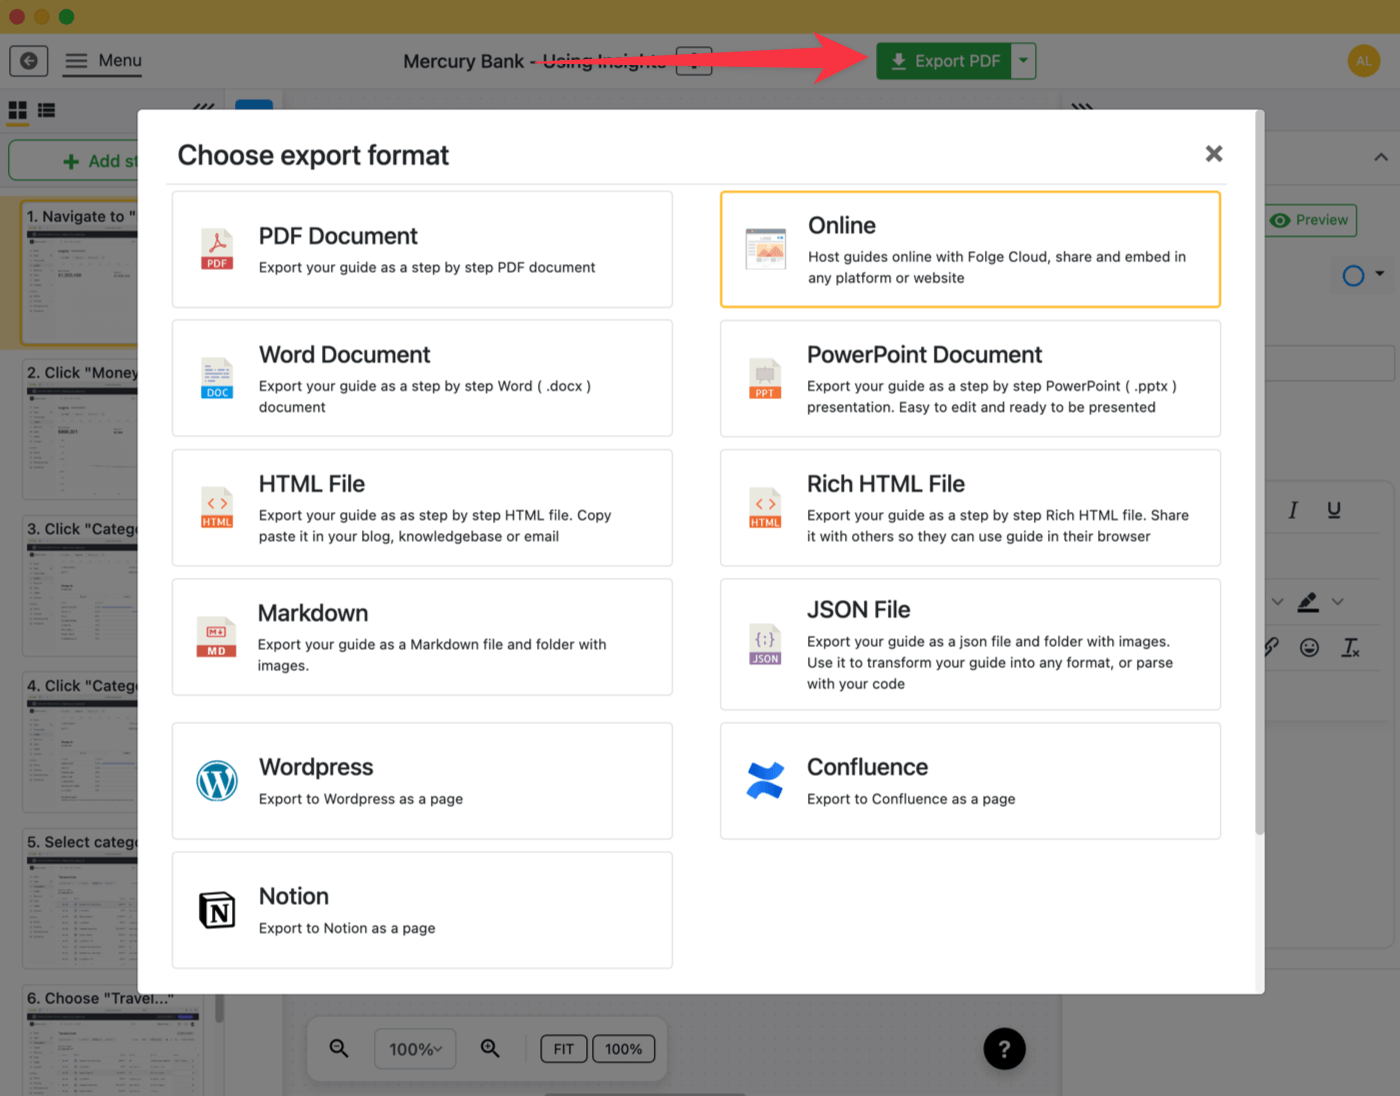
Select a format to open the export settings. On the left you'll see your saved templates — on the right, all the customization options for layout, fonts, colors, headers, logos, and more. Some settings might only appear for certain formats.
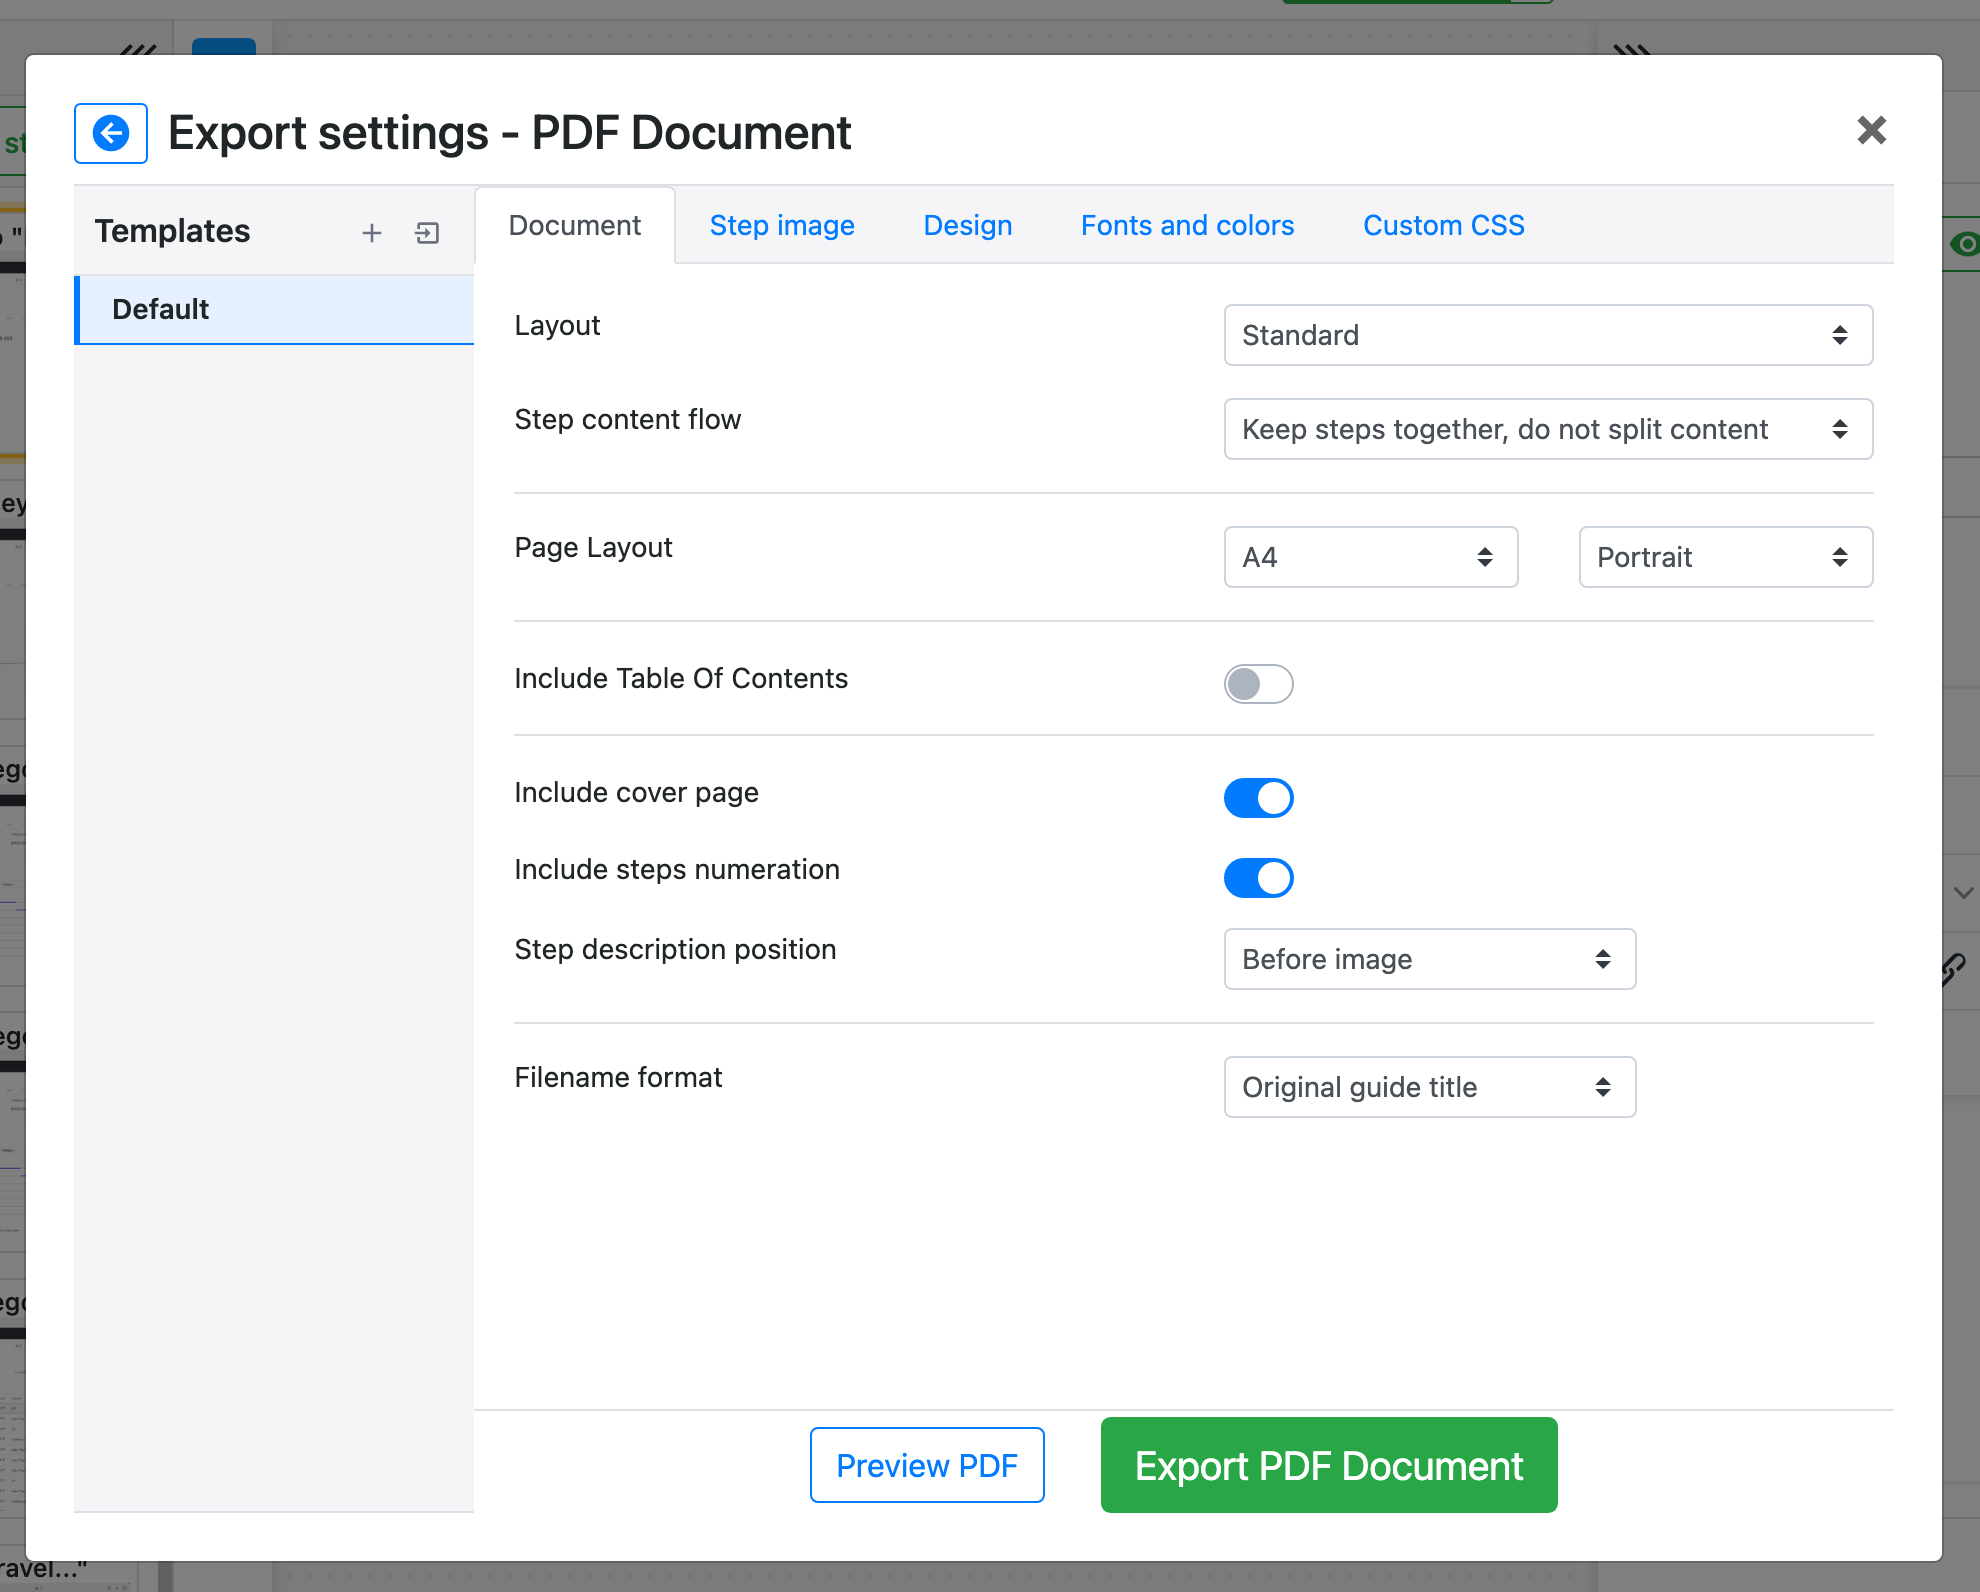
Click Preview to see how your guide will look, or click Export to generate the final document.
# Next steps
- Step Types — learn about the different kinds of steps
- Annotations & Shapes — all the tools for annotating screenshots
- Substeps — organize steps into a nested hierarchy
- Custom Watermark — brand your exported guides
- Placeholders — use dynamic variables in your content