Improving technical documentation workflows can save time, reduce errors, and enhance team productivity. Here’s how:
Review Your Current Workflow: Map processes, track metrics like time-to-publish, and gather feedback to identify bottlenecks.
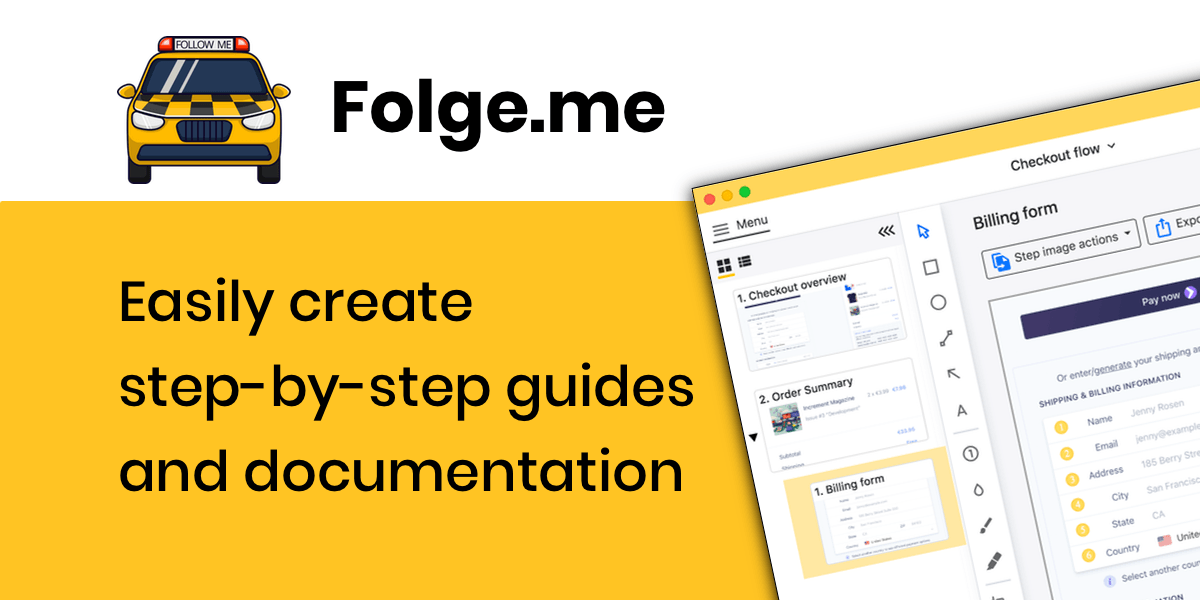
Leverage Visual Tools: Use tools like Folge to automate screenshots, add annotations, and export in multiple formats.
Standardize Templates: Create reusable templates for consistency and faster document creation.
Implement Quality Checks: Automate reviews with tools like Grammarly and Acrolinx to catch errors early.
Enable Team Collaboration: Use platforms with version control and real-time editing to streamline teamwork.
Quick Comparison of Documentation Tools
| Feature | Folge | Scribe | Lucidchart |
|---|---|---|---|
| Focus | Visual guides & tutorials | Automated how-to guides | Diagrams & flowcharts |
| Collaboration | Basic | Real-time | Advanced |
| Integration | Confluence, SharePoint | Enterprise API access | G Suite, MS Office |
| Pricing | $8/user/month | $29/month | $7.95/month |
These strategies and tools help teams write better, faster, and more consistent documentation. Start by assessing your current process and build from there.
Writing effective documentation
1. Review Your Current Documentation Process
Visualize Your Workflow
Use flowcharts or process mapping techniques to create a clear picture of your documentation pipeline. This helps pinpoint bottlenecks and areas where consistency might be lacking.
Track Key Metrics
Measure things like time-to-publish, content quality, user engagement, and team productivity. These benchmarks give you a starting point for improvement.
Use Process Analysis Tools
Introduce structured tools to clarify roles and improve efficiency. For instance, a RACI matrix (Responsible, Accountable, Consulted, Informed) can reduce confusion during handoffs, while value stream mapping highlights unnecessary steps in your workflow.
Collect Feedback from Stakeholders
Focus on gathering input through:
Surveys with cross-functional teams
User satisfaction data
Analysis of support tickets
Insights from usage analytics
Assess Your Current Tools
Regularly review your tools to see if they meet your team's needs. Check for integration options, ease of use, and maintenance demands. This step often reveals gaps that can be addressed with specialized tools, as discussed in Section 2.
2. Use Visual Tools Like Folge for Documentation

Once you've reviewed your workflow (Section 1), consider using visual tools like Folge to tackle bottlenecks with automated documentation. These tools simplify processes by automating repetitive tasks, making documentation faster and easier.
Folge, available for both Mac and Windows, is designed to simplify documentation with its automated features and visual content creation tools.
Automated Screenshot Capture
Folge automatically takes screenshots with every mouse click, saving you from the hassle of capturing and organizing images manually. This feature significantly reduces the time needed to create documentation [9].
Annotation Options
Folge provides nine annotation tools to help you add context and clarity to your visuals. These include:
Shapes like boxes and circles to highlight specific elements
Text overlays for additional explanations
Blur tools to hide sensitive information
Magnification tools to emphasize key details
Flexible Export Formats
With Folge, you can export your documentation in multiple formats, making it adaptable to various platforms:
| Export Format |
|---|
| HTML |
| Word |
| Confluence |
| SharePoint |
Tips for Getting Started
Use Templates: Set up templates for different types of documentation to maintain consistency [3].
Measure Effectiveness: Track metrics like time spent on documentation, reductions in support tickets, and user success rates to evaluate and improve your process.
Seamless Integration
Folge integrates with platforms like Confluence and SharePoint, allowing you to embed visual documentation directly into your existing systems [1]. This makes it easier to share and manage your documentation across teams.
3. Create and Use Standard Templates
Once you've tackled workflow issues (Section 1) and introduced visual tools (Section 2), it's time to step up your efficiency game with standard templates. Companies that rely on standardized templates have reported cutting document creation time by 35% and reducing revision cycles by 25% [6].
Key Elements for Effective Templates
Every technical documentation template should include these key sections:
| Component | Purpose |
|---|---|
| Title Page | Identifies the document |
| Table of Contents | Helps navigate through sections |
| Terminology Section | Defines standard terms |
| Main Content Areas | Ensures organized content flow |
| Revision History | Tracks changes and updates |
Smarter Template Management
Use tailored templates for different document types while keeping them consistent with your brand. Modular designs can help you mix and match sections as needed [8].
Tips for Maintaining Templates
Review Regularly: Conduct quarterly template audits to ensure relevance.
Track Changes: Use version control to manage updates.
Gather Feedback: Collect input from users to refine templates.
Stay Aligned: Sync template reviews with workflow evaluations from Section 1 for better results.
How to Measure Success
To see if your templates are working, monitor these metrics:
User satisfaction: Are users happy with the templates?
Adoption rates: How often are templates being used?
Automating Templates
Modern documentation tools can automate templates, slashing manual work by 70% [2][3]. When paired with Folge's visual automation tools (Section 2), templates not only save time but also ensure consistency in structure and style.

4. Set Up Quality Control Checks
Having a solid quality control process can help cut documentation errors by 45% and improve efficiency by 30% [4][1]. By building on earlier steps like process audits (Section 1) and standardized templates (Section 3), these checks ensure your documentation is both accurate and consistent. For instance, Cisco Systems saw a 22% drop in documentation-related support tickets after introducing automated quality checks.
Key Components of Quality Control
| Check Type | Tools/Methods |
|---|---|
| Style Consistency | Acrolinx, Vale |
| Technical Accuracy | SME review workflow |
| Language Quality | Grammarly, LanguageTool |
| Accessibility | Built-in accessibility checkers |
How to Build Your QC Process
A good quality control system relies on a clear, step-by-step review process. Here’s how to get started:
Define Clear Review Stages: Set up a workflow that includes self-review, peer review, and SME (Subject Matter Expert) validation. Companies using this method report a 76% boost in documentation accuracy [5].
Use Automated Tools: Tools like Vale or Folge’s built-in validation features can flag problems automatically, saving time before manual review even begins.
Establish SME Protocols: Subject matter experts should focus on verifying technical details and context. Give them clear guidelines to streamline their review process [7].
Tracking Quality Control Success
To measure how well your quality control process is working, monitor these metrics:
Number of errors caught before publication
Time spent in review cycles
Feedback from users
Frequency of documentation-related support tickets
Consistency scores for your content
These steps lay the groundwork for better team collaboration systems, which we’ll cover in Section 5.
5. Set Up Team Editing Systems
Once you've established quality checks (see Section 4), it's time to focus on collaborative editing systems. These systems are essential for maintaining consistent documentation across distributed teams. Companies using such systems have reported cutting review cycles by 40% [5].
Key Elements of Team Editing
| Component | Purpose | Impact |
|---|---|---|
| Version Control | Tracks changes and manages versions | Cuts documentation errors by 30% [1] |
| Collaborative Platform | Enables real-time editing and feedback | Boosts team efficiency for 85% of users [5] |
| Review Workflow | Structures the approval process | Speeds up approvals by 40% [12] |
| Access Controls | Manages security and permissions | Ensures proper access for contributors |
How to Build an Effective System
Here are some practical strategies to get started:
Integrate Version Control
Use Git-based tools to track changes and avoid merge conflicts, ensuring smoother collaboration.
Define Roles and Permissions
Platforms like Confluence allow you to assign specific roles, such as:
Content creators: Draft initial content
Technical reviewers: Check for accuracy
Final approvers: Sign off on completed work
Automate Quality Checks
Leverage tools like Vale or Acrolinx to automatically flag style inconsistencies and errors, cutting editing time by 30% [11].
Tracking Results
Monitor metrics like publishing speed, the number of revision cycles, error frequency, and feedback from end-users to evaluate the system's effectiveness.
Documentation Tools Comparison
Boost your team's editing capabilities (as discussed in Section 5) by using tools tailored to your documentation needs. These tools support specific workflows and enhance productivity.
Core Capabilities Comparison
| Feature Category | Folge | Scribe | Lucidchart |
|---|---|---|---|
| Primary Focus | Visual guides & tutorials | Automated how-to guides | Diagrams & flowcharts |
| Team Features | Collaboration tools | Real-time collaboration | Advanced team editing |
| Integration | Enterprise API | Enterprise API access | G Suite, MS Office |
Performance and User Experience
Folge simplifies software documentation with automatic screenshot capture. Scribe streamlines web process documentation using browser extensions. Meanwhile, Lucidchart shines in diagramming, backed by over 1,500 G2 reviews [4].
Cost-Effectiveness Analysis
| Tool | Pricing |
|---|---|
| Folge | $8/user/month (annual billing) [1] |
| Scribe | $29/month (annual billing) [10] |
| Lucidchart | $7.95/month (with per-seat licensing) [4] |
Integration Capabilities
Each tool offers different integration options: Folge embeds directly into workflows, Scribe provides API access, and Lucidchart integrates seamlessly with productivity tools like G Suite and MS Office.
Best Use Cases
Match your choice of tool to your specific needs:
Folge: Best for creating detailed software tutorials and user guides, especially when visual clarity is key.
Scribe: Ideal for teams documenting web-based processes automatically.
Lucidchart: A great fit for organizations needing collaborative visual documentation, such as process mapping (refer to Section 1).
Next Steps
To put the strategies from Sections 1-5 into action, here’s how to build on the workflow improvements and tool recommendations discussed earlier.
Execution Roadmap
Use the process assessment approach from Section 1 to pinpoint key areas for improvement. Then, follow this step-by-step plan:
| Phase | Timeline | Focus Areas |
|---|---|---|
| Tool Selection | Weeks 3-4 | Testing and evaluating visual documentation tools |
| Template Creation | Weeks 5-6 | Standardizing document formats |
| Quality System | Weeks 7-8 | Establishing review processes |
| Team Training | Weeks 9-12 | Training on tools and workflows |
Measuring Success
Focus on tracking these metrics to gauge progress:
Time spent on documentation tasks (compare baseline to post-implementation results)
Error rates before publication
Team productivity metrics
Resource Allocation
Start with small, manageable changes to encourage better adoption rates [10]. Base your initial efforts on the findings from your workflow audit in Section 1.
Training Support
Investing in the right training can lead to 40% faster adoption of new documentation processes [4]. Create internal guides for the tools, and schedule weekly troubleshooting sessions during the rollout phase to address any challenges.
FAQs
What is streamline documentation?
Streamline documentation refers to simplifying and improving the processes involved in creating and managing documents. The goal is to make these processes more efficient and accurate. By using tools like automated systems (see Section 2) and standardized templates (see Section 3), it helps eliminate repetitive tasks and ensures consistency.
For example, tools such as Folge (Section 2) provide features like automated screenshot capture, while collaborative platforms (Section 5) offer version control for seamless teamwork. This method aligns with modern workforce preferences for easily accessible, self-service information.
Get started with Folge today for free.